

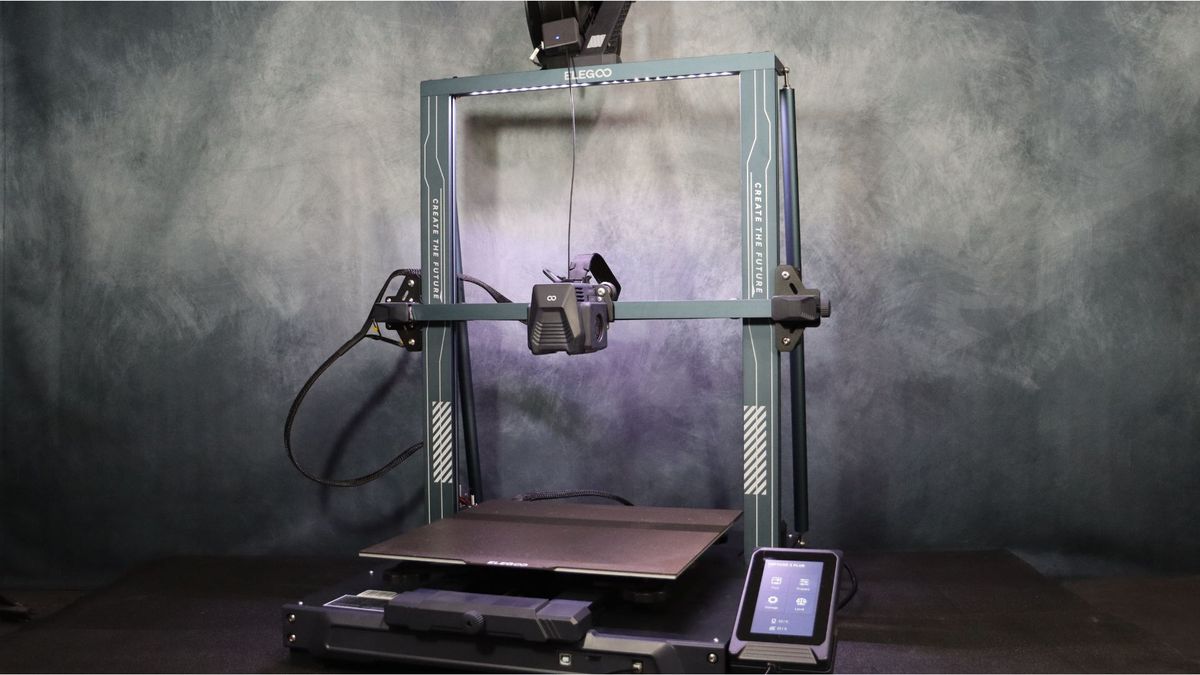
Elegoo formally unveiled its improved Neptune 3 Sequence, which consists of three fashions with varied print volumes, late final yr in November. The Elegoo Neptune 3 Plus is the center choice when it comes to measurement and price; it is ultimate for individuals who want extra print quantity than what nearly all of low-cost 3D printers can present, however do not want all of the bells and whistles of the top-end mannequin.
On paper, the Elegoo Neptune 3 Plus has rather a lot going for it with a construct capability of 320 x 320 x 400 mm and a direct drive extruder – excellent for challenging-to-print supplies like TPU. It additionally has a swanky 49-point auto-levelling system that may be manually adjusted too, so you will get began rapidly and nonetheless have the choice to essentially fantastic tune your mattress.
When in comparison with different 3D printers in the identical value vary, the Neptune Plus is seeking to be one of many best 3D printers out there proper out of the field because of its excellent characteristic set, glorious efficiency, and aggressive pricing. Whether or not you are on the lookout for one thing to print out Star Wars cosplay items, spaceship fashions, or the rest, the Neptune 3 Plus is price contemplating.
Elegoo Neptune 3 Plus: Design & setup
Like most FDM printers, the Elegoo Neptune 3 Plus is delivered to you 90% constructed, and the remaining meeting necessities are minimal. The upright meeting should first be fixed to the printer base utilizing the 4 included screws.
What’s within the field
Printer base
Z and X axis meeting
LCD contact display Magnetic base
4.3-inch LCD touchscreen
Spool holder
Filament run out sensor
Tie Rod helps
Energy cable
Instrument package for meeting
Plastic scraper
aspect cutters
USB cable
Spare nozzles
USB reader
The LCD display is then plugged into the entrance of the printer, secured within the magnetic cradle, and hooked up to the bottom. The filament run out sensor and spool holder can now be hooked up to the highest of the printer. The help tie rods on the printer’s rear are then fixed to the brackets on the highest of the printer. Elegoo has marked all of our connections, so the final step is as easy and easy.
Make sure that to go away sufficient space when attaching the cable clip holding the hotend meeting wiring harness in order that there will not be any issues when the print head reaches the far proper aspect.
Picture 1 of 11

We will activate the printer as quickly as you are by way of with the meeting. The mattress should first be levelled manually earlier than the auto degree is used to test 49 areas on the mattress and retailer the mesh. As soon as accomplished we’re prepared to begin our first print.
The Neptune 3 Plus’s design was largely carried over from the Neptune 3 Professional, with just a few minor changes made to account for the upper construct quantity. The 2 help tie rods on the again of the printer which assist to cut back any wobble, a second Z axis stepper with a timing belt to maintain the Z axis in sync for these fashions that can use the 400mm top, and 6 levelling knobs on the platform to make sure you get the right degree are the principle adjustments. A second rail was additionally added to the Y axis to help the bigger mattress. The highest rail of the printer additionally has an LED gentle strip that performs a superb job of illuminating the work space.
Picture 1 of 7
Elegoo Neptune 3 Plus: Specs & options

The Neptune 3 Plus shares the identical direct drive configuration and 4.3-inch touchscreen because the Professional and Max in addition to the X and Y axis belt rigidity adjustment knobs. Along with the textured magnetic spring metal PEI sheet, which leaves a textured floor on the underside of the prints, the graceful aspect can be utilized to print however might require some adhesion help however will depart a easy, glass-like end on the underside if that is what’s wanted.
Key specs
Levelling: 49-point Computerized Mesh leveling
Construct Quantity: 320x 320 x 400mm
Printer Dimensions: 533 x 517 x 638mm
Printing Velocity: 30-180mm/s
Nozzle Temperature: 260°C / 500F
Sizzling Mattress Temperature: 100°C / 212F
Management panel: 4.3-inch coloration touchscreen LCD
Platform: Magnetic Versatile PEI sheet
Supported filaments: PLA, ABS, TPU, PETG, WOOD, and so on
Web weight: 31.3 lbs / 14.2KG
The Neptune 3 Plus comprises all of the options required for fine-tuning the printer, together with the handbook and auto-level menus in addition to configuration choices for altering your printer’s settings in addition to acceleration and jerk, making it easy to make changes. A coiled twine that connects the LCD to the printer and allows display elimination makes it a lot less complicated to alter choices and cargo prints because of the magnetic cradle.
Lastly, the spool holder is high mounted and robustly constructed – we have seen a whole lot of flimsy plastic spool holders on different printers on this value vary and we’re glad that Elegoo hasn’t gone down that route right here.
Elegoo Neptune 3 Plus: Print high quality & pace
The included check print with Polymaker polylite PLA was the primary print we produced on the Neptune 3. There have been no apparent issues with the print and neither over-extrusion nor under-extrusion could possibly be seen.
Picture 1 of 2
We determined to try a pair extra small check prints earlier than we moved onto fancier designs. The standard 3D Benchy boat (opens in new tab) comes first. Using the default profile included with the Elegoo Cura, we printed the benchy at a pace of 80 mm/s. It labored out nicely; there have been no issues, not even on the roof of the boat’s overhangs or bridges. By tightening the X-axis belt, the we managed to get rid of the everyday ghosting difficulty on the entrance of the hull.
Picture 1 of 2
For the ultimate small check print, we chosen the well-known Cali-Dragon model from Cults 3D (opens in new tab), which is an ideal check for overhangs, ghosting on each axes, and stringing points between the horns. The dragon printed flawlessly utilizing the identical settings; there isn’t a stringing between the horns and the backs of the horns are clear.
Picture 1 of 3
We selected to attempt a extra intricate mannequin after the preliminary tiny check prints got here out nicely. This Batman Gaslight V2 bust by Eastman (opens in new tab) was printed at an 80mm/s with 0.2mm layer top. The bust turned out implausible; the material of the garment and the armor each have unimaginable element. There have been no issues with the completed product. The dual half cooling followers stop any sagging of the overhang on the nostril of the cowl.
Picture 1 of 4
We sliced and printed the Darkseid bust from Eastman (opens in new tab) after the Batman bust’s success. The an identical settings produced the identical outcomes as prior prints: every part was clear, there have been no issues, and the exceptional element on the material and texture of Darkseid’s arms could possibly be seen. This would possibly even successfully compete with resin printers if it had been printed at a decrease layer top.
Picture 1 of 3
We then determined to attempt one thing a bit of extra intricate with just a few extra components for the ultimate print. Gambody’s Klingon Bird of Prey (opens in new tab) is proven right here; it’s printed in a number of items, and gears are included to permit the wings to maneuver from the conventional to touchdown place. This print made good use of the construct quantity as a result of we might fill the mattress with components, and, as with earlier prints, we used the identical slicer settings except just a few minor help settings changes.
To finish all the weather required to assemble the ship, it took round a day and a half to print. With fashions like this, printer accuracy is important to make sure right match and performance. Just a few points attributable to help settings had been the one points with the printed items, and so they had been readily addressed.
The result is implausible. Even at 0.2mm layer top, the element is great, the items are easy to assemble, and the inner gears that transfer the wings work freely and with out binding. One of many extra spectacular FDM printers we have now examined this yr the Neptune 3 Plus, which is poised to land among the many high ranks on our checklist of the most effective 3D printers.
Picture 1 of 5
Do you have to purchase the Elegoo Neptune 3 Plus?
With a $350 price ticket and a construct quantity of 320x320x400mm, the Elegoo Neptune 3 Plus is among the most promising 3D printers within the value vary. Along with having a full characteristic printer with direct drive and auto levelling, the Neptune 3 Plus additionally has an easy-to-use touchscreen with all of the instruments wanted to calibrate and fine-tune the printer.
Comparable printers in the identical value vary are within the 220x220x250mm or 235x235x250mm construct quantity vary. You cant beat the worth included with the Neptune 3 Plus.
If this product is not for you?
Picture 1 of 2
If you happen to want one thing a bit of larger than the Plus, the Elegoo Neptune 3 Max (opens in new tab) may be thw option to go. It has a hefty construct capability of 420x420x500mm, and with an MSRP of $470, it will not break the financial institution both.
If measurement shouldn’t be a priority, the Elegoo Neptune 3 Pro (opens in new tab) is out there for $230 USD. Elegoo seems to be to have the printer that can meet your wants, it doesn’t matter what your wants or price range are.
